Monday, April 30, 2012

Spring Inspired Birthday Party

Just over a week ago my daughter celebrated her third birthday. Hard to believe how quickly the time has gone!

To honor the big day, we hosted a spring-inspired party and celebrated with family and friends. Bright pinks, blues and greens were peppered throughout, with flowers, butterflies and pinwheels making appearances too.

Here's a quick sampling from the big day, beginning with a shot of the birthday girl in her coordinating outfit (a tradition my sister started).


Switching to decor, a stop in the "dollar" section at Michael's yielded these coordinating vases that were each given a bright purple tulip (the birthday girl's favorite color).


That brightly colored table cloth is actually fabric, scored for $1.50 per yard and making it just as economical as its plastic counterpart.

Below, Michael's also produced some large and small butterflies that were added to each of our chairs.

Paper lanterns and coordinating ribbon added some pizazz to our linear chandelier and highlighted the cake I made for London. Under that fondant was vanilla cake with a blueberry whipped frosting. Yum!


These giant Bella Vanilla Bean cupcakes from Pick 'n Save were also added, bringing in lots of color and sugary goodness.

Behind the table our buffet was home to a small candy bar (I used ribbon and scrap book stickers to label each) and some butterfly-kettle corn (locally made/sold and delicious!) bags. I found a similar idea that inspired these butterflies on Pinterest using clothes pins but they were out at the store so I opted for colorful pipe cleaners instead.


Across the way, the ribbon used on the candy jars was also incorporated on an assortment of fruity drinks that filled plastic "milk bottles" with colorful straws.


Per usual, matching plates, napkins and forks were used. Likewise, some serving platters (A.K.A. chargers) and bowls that I picked up around Easter-time for only $1 each.


I'm a big fan of serving foods that guests can grab and eat as they walk by or are easily consumed over conversation. We tried to keep those brightly colored too. Like these strawberry shortcake kabobs. 


And these caprese cups with bright blue forks! A few grape tomatoes, basil, mozzarella balls and balsamic  vinegar--good to go.

Those little blue forks also made an appearance in my fruit cups. Simple plastic cups filled with fruit and topped with an umbrella skewered with cheese ... again, healthy but easy! And the kiddos liked the umbrellas!

Finally the little party-goers were given a parting gift. Namely wind-up pinwheel pens, note pads and swirly suckers (with a little extra space for goodies from the candy bar).


Overall we had a wonderful day and our little girl loved her very girly party. Special thanks to all those who helped us celebrate!

Tuesday, April 24, 2012

Nursery Progress: Worldly Wall Art & More

Whew! It's been a busy week. There's been lots of progress in the nursery now that the old furniture is cleared out and the walls are painted and ready to go.

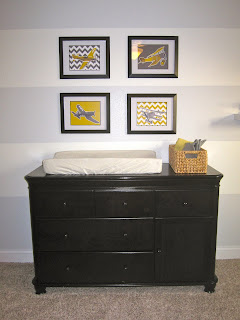
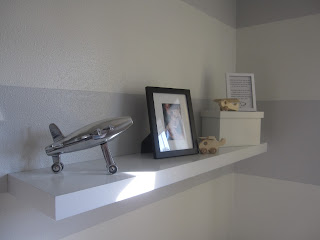
With the dresser in place, I was able to hang the airplane pictures I framed the week before and begin to add some accessories to the shelf that we rehung in the room.


I also spotted these little airplane hangers at the store and though they weren't in my colors, they'd work well after a little visit from the spray paint fairy. I got out a can I already had of Rustoleum's Warm Yellow and gave them a dusting.


I thought they could work well under the white shelf ... an area I plan to fill with more pillows and then make into a reading corner later.

To utilize the plane's "propeller hooks" I picked up some simple canvas bags that were a couple bucks each and some white puffy fabric paint. I had a stencil already which I ended up just using for reference as the puffy paint didn't work really well in the letters.


In the end, I just free-handed the words "BOOKS" & "TOYS." Later, my son and daughter are going to help me fill them with goodies they'd like to give to the baby from their own libraries and toy chests.


Sorry ... weird yellow coloring going on in that photo. The one below is better.


Nifty, right?

Besides these simple hooks, one of my favorite projects for the room was incorporating a world map art piece that I wanted to make for above the crib. I don't want the room to be all airplanes, rather I'm trying to incorporate other elements that are just a logical tie. A map fit the bill.

That said, when I looked at regular maps or contemplated the idea of framing them, the idea didn't feel quite right. What I really wanted was something three-dimensional ... and unique.

So I came up with a plan and headed to Michael's Craft Store for supplies. I came back with the following:
  • 1/2" thick white foam board
  • World map print
  • Utility knife
  • Marker (from home)

To get started, I began loosely cutting out the countries ... or really continents for that matter. I didn't cut too close because what I really just wanted was to get the general shape. And I wanted the shapes of each to be bigger than those in the map I purchased (I just bought what they had).

As you can see by the pile of scraps below, there were several countries that didn't make it. If you were an island, you were sadly left behind.


Next I laid each of them out and again, loosely traced a line around each. Let's just say this is an "artistic representation" of the world we live in. It's not going to win any awards for being realistic--or accurate for that matter.


Once those were done, I had an outline of each to cut out. And don't ask what happened to Australia. I was having some troubles there. I also have to comment that I'm positively baffled by the size of Greenland. Who knew??? It's as though I went my whole life without knowing the Pope was Catholic. I'm just utterly astonished by the size of it.

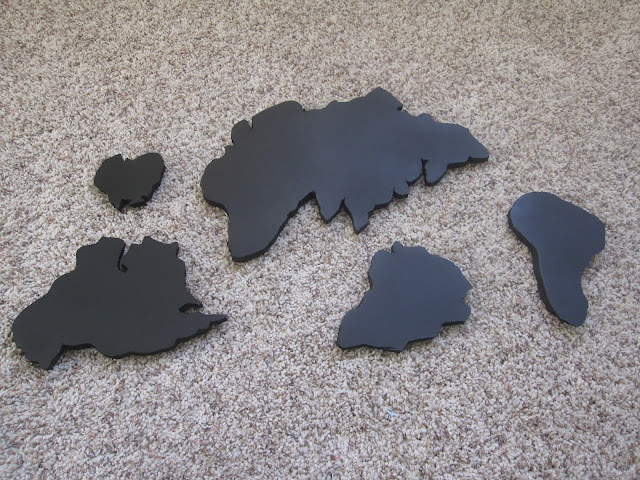
Anyhow, after putting my utility knife to work, this is what they looked like. See 'em? Right below that enormous shadow. *sigh* Will my photography never improve?


Okay, so next step was to paint these black. Once again, I used spray paint: Rustoleum Flat Black.


And then I hung them above the crib. I was planning to use 3M strips but couldn't find them so opted for nails. Which was a so/so idea because I couldn't quite get them in the right spot at first so now there are more holes than I'd like to admit to. Would you like to know just how many holes? Can't tell you. Someday my husband may actually read this blog.

BEFORE:

AFTER:


With that, I think I'm 85% of the way there! So excited.

Wednesday, April 18, 2012

Nursery underway

I recently entered the third trimester of my pregnancy (whew, finally!) and as I did, realized it was time to get started on a nursery for our newest addition.

After tossing around some options we decided everyone would sleep better, at least in the first year or two, if the baby got his own room. So our guest room was in need of a makeover and that got underway this weekend.

To keep the full size bed that was in our guest room available for guests, we decided to buy a twin/full bunk bed for my son's room. He loves it...almost as much as my daughter who has since moved in with him. Guess we didn't need that third room after all. Ugh.

Anyhow, the first step was to clear out some of the furniture. This desk, which my husband made for me, for starters.

Followed by the full size bed I just mentioned. All that was left was this headboard. It's the first upholstered headboard I ever DIY'd and as it turns out, this guy is in need of a new home. It's free to a good one if interested and for the price of a grande skinny vanilla latte, I'll even recover it for you in a fabric that matches your decor. We had it hanging directly on the wall with a simple bed frame pushed up against it and it's served us well. Just let me know if you think he could be happy in your home too.

Back to the matter at hand. My first step for the nursery was to start purchasing some decor. Per usual, I didn't want any typical baby decor in the nursery so I began scouring for items that would fulfill my vision for the room. You see, long before I even knew I was having a boy, I had a boy room all mapped out. Theme: Airplanes. Colors: Grey, yellow, white, black, cream.

First, I ordered these prints from the Paper Llamas shop on etsy.com. Then, I picked up a few very simple black frames that came with white matts.


Once they were framed, I set them aside and decided to focus on painting the walls. They started as a soft lilac and I had this grand idea to do very large, bold, horizontal stripes. I asked my husband to paint them and when I described the tedious process I wanted him to follow to ensure that the lines would be clean given our textured walls, he looked less than thrilled. But I was not deterred.

After much debate and several paint samples, I settled on two pretty light colors from Glidden. One was Muslin White (slightly creamy in color) and the other was Shaded Ice. Shaded Ice was grey in nature, definitely on the blue side of the scale. I was a little worried they'd be too light but was more afraid of going too dark so I held my breath and ordered them. When they handed me the paint, I was even more worried because it appeared I was purchasing $60 worth of white paint. I couldn't see any color--on either can.

When I got home and showed my husband, he agreed that indeed, I bought lots of white paint. I suggested we just try it and up against the white trim, still very little contrast. But we still forged ahead painting the lowest stripe, and then adding a little of the Muslin White above it. Seemed there was some potential but this project would require a lot of faith.

Eight hours later, my husband emerged from our nursery and told me I could look. When I opened the door ... big smiles. Really big! It looked awesome and just like I had pictured in my head. He did an amazing job, the lines were perfect and the color soothing. Yipppppeeee.

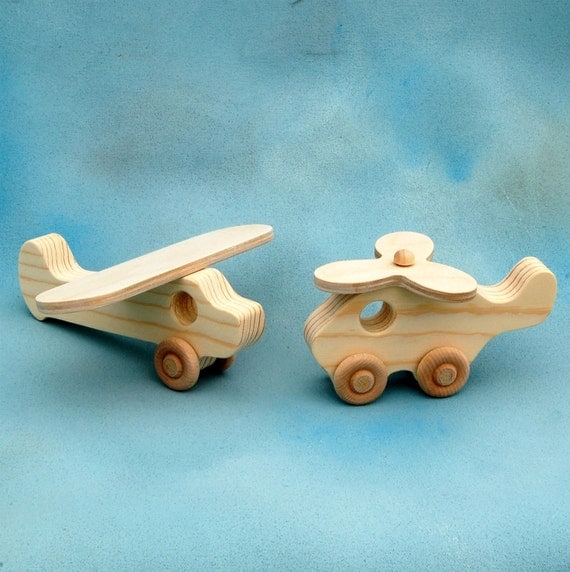
Now the fun part begins. And with a few more purchases behind me, work continues to pull the whole room together like finding a home for these guys also purchased on Etsy.

Wooden Toy Airplane and Helicopter Play Set


Stay tuned!