I had toyed with some ideas for side tables in the past and thought we'd be able to make one on the cheap. To get started, I stopped in at Goodwill one day where I spotted the genesis of my creation. It was a lazy susan originally from IKEA and it was only $5. Score.

So I scooped it up and then headed to Menards to purchase a stair rail that I planned to use for the stem of the table. It came in at $6 so I was cooking with gas.

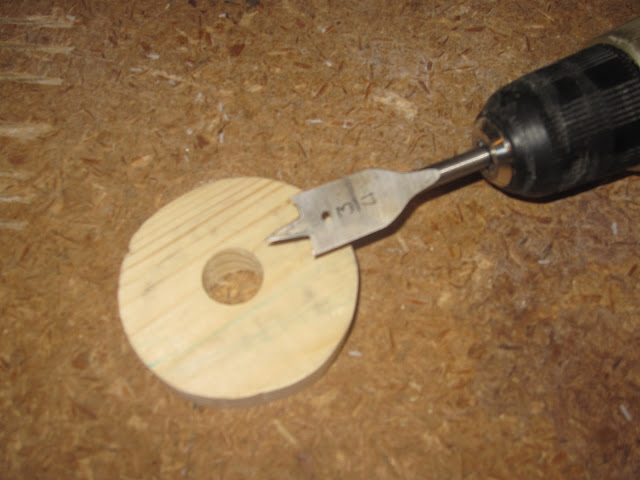
When I got home, I described my idea to my hubby and he agreed to make it happen. The gist of it was to utilize both pieces of the lazy susan. Since the top was already, well, perfectly round ... it saved us a lot of work in sanding or finishing something else. And since there was an equally round bottom on which the top used to spin, we figured that could be the base. He basically needed to cut down the railing piece, make a small circle to adhere it to the top and a whole bunch of other steps that he captured here. Unfortunately I didn't hang around to witness most of it so I can only show evidence of this work via pics. Here they are.


And then this is what it looked like when it was put together. While the colors weren't a perfect match, it didn't matter because my sister planned to use some left over paint to make it white.

Sadly, when we took it to its home in the nursery (prior to painting) we discovered it wasn't stable enough for carpeting. Sniffle. I guess that bottom was a little shrimpy lookin'. And it was also a few inches too high. Generally speaking I think it's good to target the height of the chair's arm, and this guy was a few inches above it.
So it came back home with me until we could figure out a solution for the bottom. Then one day my hubby came home with another Goodwill find, and a $2 find at that. I'm not even sure what it is but it was pretty close to perfect. It was wood, heavy, and smaller in diameter than the top. And the little "trays" seemed like it'd give the table some detail.

So the table got a little trim to bring it down in size and then the bottom piece was added. After it was painted and put in place, it turned out pretty well. Given my sister had left over paint and we got most of our materials super cheap, the total cost was only $13! How's that for economical??
I think the thing I love about this project is the table meets her needs, but she didn't have to spend a fortune on a piece of furniture that probably won't stay after her daughter hits the toddler stage. For now, it works and when it's later replaced with something else, there won't be any guilt in letting this guy go.


