With Thanksgiving behind us, the Christmas music in full swing and a long weekend to get stuff done, it was officially time to kick off my Christmas decorating!
To give my house a nice, pulled-together look, I've been gradually moving in the direction of a Christmas color scheme each year. This particular season, I've been liking the idea of chocolates, golds, champagne and lime green. Generally speaking, I recommend a minimum of three colors that you'll repeat throughout your space. So if you traditionally like red and white, consider adding silver or a deeper, burgundy red. For something contemporary, try white, silver and a pop of bright pink or a cool blue. All combinations that can really be fun.
To get mine started, I pulled out a handful of old Christmas ornaments that fit the bill and scooped up a selection of new items on Black Friday. I tried to stick to the shatterless ornaments in various colors and textures (glittery, matte, etc.). I also picked up some glittery snowflakes from target, $1/4 and stopped at a dollar store as they sell sleeves of ornaments for a buck ... a great option if you don't want to spend a fortune but are looking to change things up.
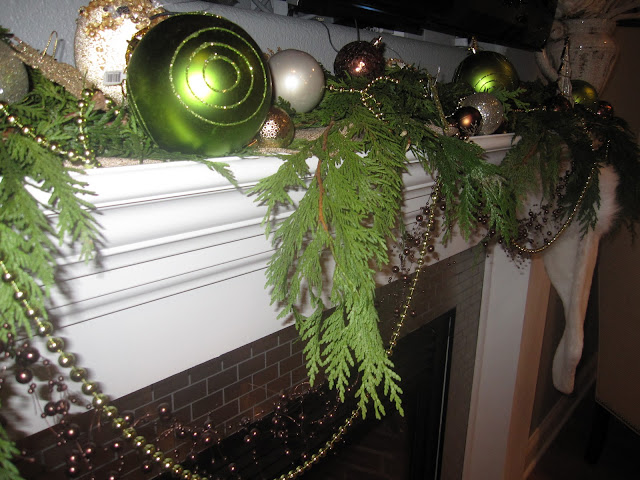
For the basis of my fireplace mantel, I also picked up real red cedar garland. I like cedar because it's soft, not sticky from sap and tends to lay very nice on flat surfaces. You'll generally find these garlands (often used in outdoor spaces) at DIY or home improvements stores like Lowe's or Home Depot. I got mine for $14 or $15 at Home Depot (20 feet). If you've been thinking of using the faux stuff, consider giving this a try.
After I cleared the mantel, I laid down an extra piece of fabric to give the garland a bit more height. There's a short "lip" on my mantel and I wanted to make sure the garland would sit well above that.
Then I cut a piece of garland that would span the length of my mantel, plus an extra 12-18 inches on each side. Since the garland all lays in one direction, once I got the main piece in place I began cutting shorter pieces to layer in the opposite direction, filling in any spaces that were a little more bare and making sure I had strands that laid down in front of the mantel.
Next, I took some pretty brown beads I had found and did two swoops in the front, simply taping the ends to the mantel. I followed that with another swoop of lime green beads. This provide a little extra glam in front, and would be framed up nicely by the stockings I hung later.
Then I began layering in ornaments of various sizes. I simply nestled them into the branches, changing up the colors and placement ... though not necessarily with any grand plan in mind. If there was a bare spot, it got an ornament. And because they were just sitting there, I had a handful that crashed to the floor (remember my recommendation for the shatterless type, well case in point...) but were quickly swooped up and put back in their wintery home. Thank you, oh creator of real-looking plastic ornaments!
I kept a vase with Manzanita branches on the right side of the fireplace for height. These branches live there year round, but this guy got dressed up with a few of the smaller round ornaments and a few snowflakes too. On the other side, I added three glittery trees in brown and gold ... scores from the after-Christmas sales last year. Note you can order manzanita branches from a multitude of places online (or you can just find some sticks or check out other retailers that sell faux branches, e.g. Crate and Barrel has white this year).
Whether you're decorating a fireplace mantel, dresser, sofa table or any other surface, there are some simple design rules you can follow for some bigger items you add in addition to your garland. One, you can do something symmetrical, using objects that match exactly on each side which will easily balance your display. The other option is to do one item on one side, and three on the other. Generally speaking, the total "volume" of the one item should be equal to the volume of three. Keeping both sides similar in height and width will help you achieve this look. It certainly doesn't need to be exact but putting a pineapple on one side and three grapes on the other isn't gonna do it.
So ... after all that was in place, I added my stocking hangers and stockings, drizzled some lime green beads over the top of everything and snapped some pictures. It's very festive and fun! As a final touch, I wrapped a few odd boxes from around the house in matching Christmas paper, this helped me bring everything together.
Shall we do a before and after photo?
BEFORE
AFTER:
I plan to use the rest of my cedar garland to decorate the buffet in my dinning room. I'll be back with pics from that Christmas update later this week.


