Saturday, March 31, 2012

Lazy Susan Turned Side Table

My sister called me one day and let me know she was looking for a small side table for her nursery. She wanted a place to set a lamp and bottles and such when rocking her daughter (who just arrived this week!!).

I had toyed with some ideas for side tables in the past and thought we'd be able to make one on the cheap. To get started, I stopped in at Goodwill one day where I spotted the genesis of my creation. It was a lazy susan originally from IKEA and it was only $5. Score.


So I scooped it up and then headed to Menards to purchase a stair rail that I planned to use for the stem of the table. It came in at $6 so I was cooking with gas.


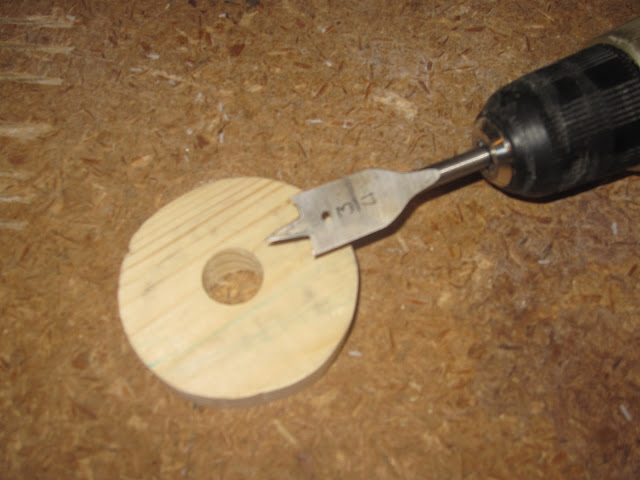
When I got home, I described my idea to my hubby and he agreed to make it happen. The gist of it was to utilize both pieces of the lazy susan. Since the top was already, well, perfectly round ... it saved us a lot of work in sanding or finishing something else. And since there was an equally round bottom on which the top used to spin, we figured that could be the base. He basically needed to cut down the railing piece, make a small circle to adhere it to the top and a whole bunch of other steps that he captured here. Unfortunately I didn't hang around to witness most of it so I can only show evidence of this work via pics. Here they are.



And then this is what it looked like when it was put together. While the colors weren't a perfect match, it didn't matter because my sister planned to use some left over paint to make it white.


Sadly, when we took it to its home in the nursery (prior to painting) we discovered it wasn't stable enough for carpeting. Sniffle. I guess that bottom was a little shrimpy lookin'. And it was also a few inches too high. Generally speaking I think it's good to target the height of the chair's arm, and this guy was a few inches above it.

So it came back home with me until we could figure out a solution for the bottom. Then one day my hubby came home with another Goodwill find, and a $2 find at that. I'm not even sure what it is but it was pretty close to perfect. It was wood, heavy, and smaller in diameter than the top. And the little "trays" seemed like it'd give the table some detail.


So the table got a little trim to bring it down in size and then the bottom piece was added. After it was painted and put in place, it turned out pretty well. Given my sister had left over paint and we got most of our materials super cheap, the total cost was only $13! How's that for economical??

I think the thing I love about this project is the table meets her needs, but she didn't have to spend a fortune on a piece of furniture that probably won't stay after her daughter hits the toddler stage. For now, it works and when it's later replaced with something else, there won't be any guilt in letting this guy go.


Sunday, February 19, 2012

Board & Batten Project

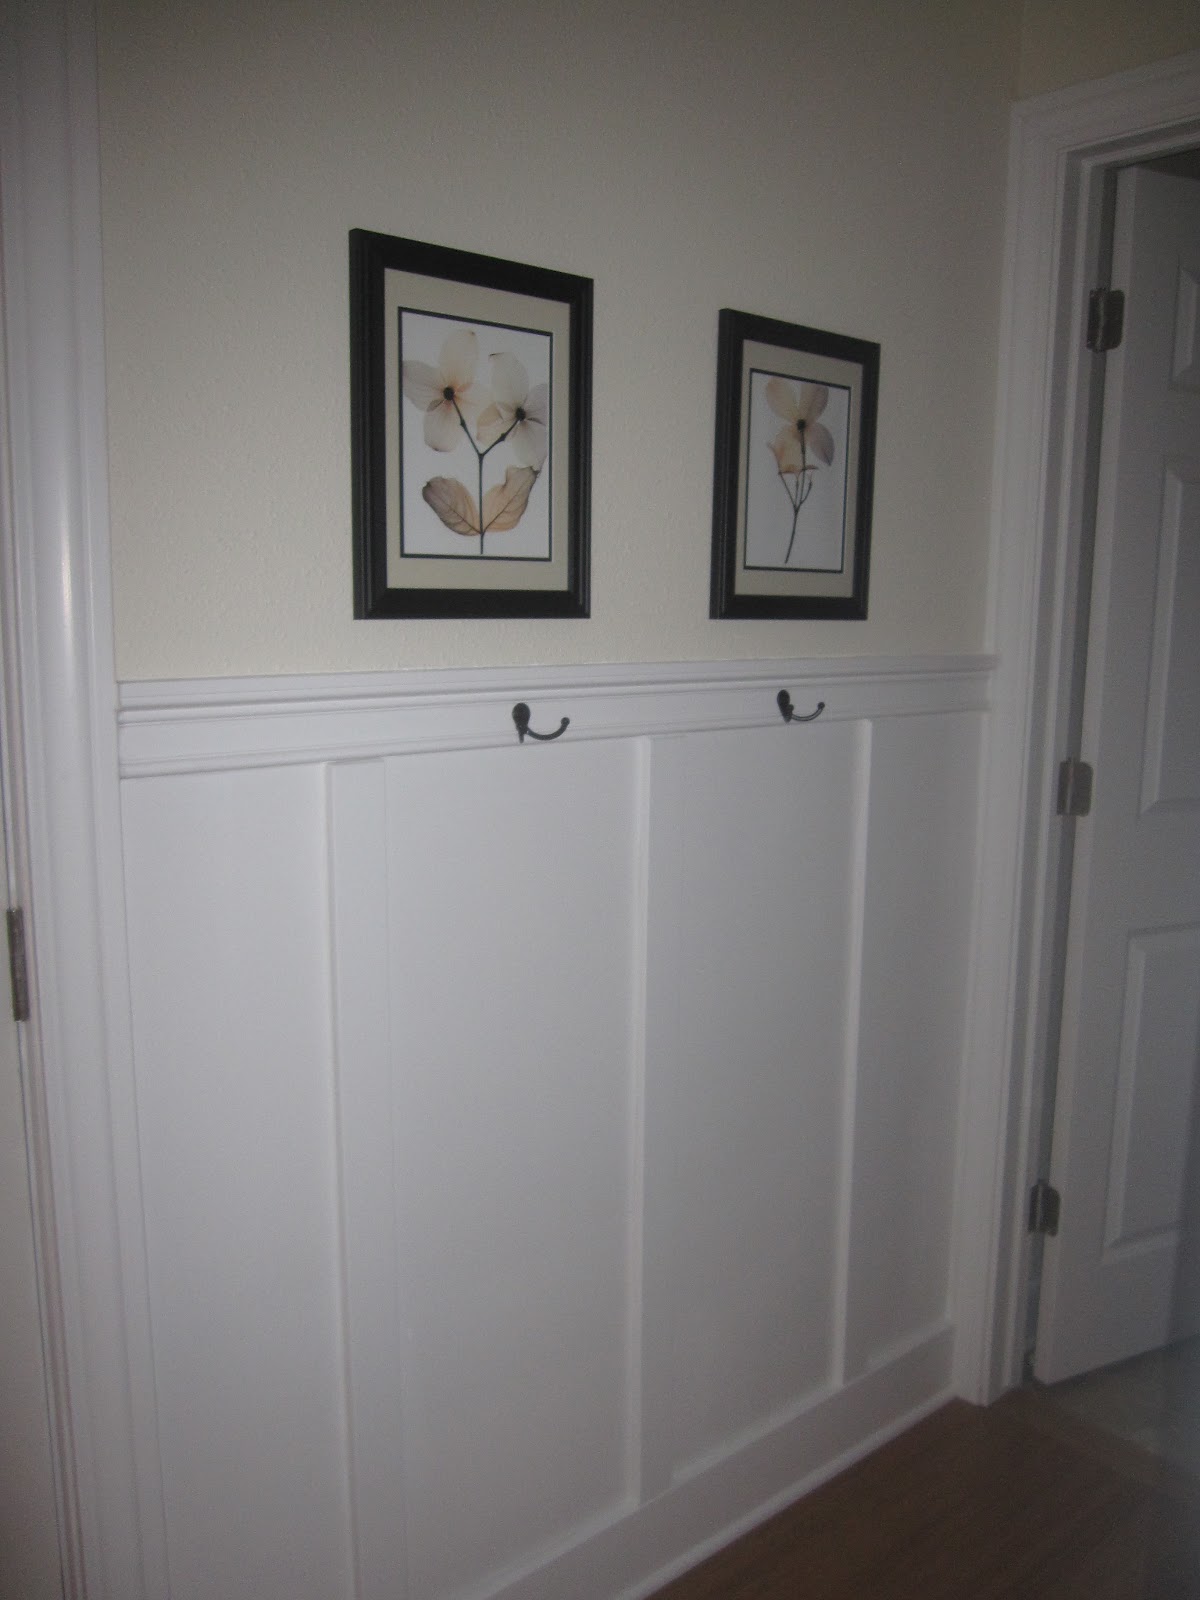
With our kids off to visit their grandparents for the weekend, it seemed like an excellent time to take on a more substantial project I've been contemplating for some time now. My idea was to add a board and batten treatment to a few walls to address two things: a place to hang our children's coats and backpacks, and to add some character to our home.

Our house was built in the Craftsman style, something that's apparent from the outside, and not at all from the inside. Since my husband and I tend to gravitate towards bright white trim versus the woods more commonly seen in this type of home, this particular treatment seemed like a great option for us.

I had seen this done DIY style by other bloggers, namely Centsational Girl, a blog I recommend visiting if you never have. You can visit this link to see one of her b&b projects.

For us, we looked at the entire space I've considered doing this to (from our entryway to the laundry room) and I think we were both overcome by fear. I never really know if the ideas in my head will translate well in real life and the idea I could actually ruin the walls for our 1 year old home was a bit daunting. So we settled on the short wall between our garage door and laundry room ... a place to test and learn.

The wall isn't very long and it's the place I wanted to use for the backpacks and coats anyhow. Even though there's a coat closet directly across from it, my bambinos haven't mastered the art of a hanger yet so a hook is simply more practical at this point in our lives.

So we started with some measurements along this wall and were off to Home Depot. When we returned, we had the following:
  • (1) 1/8 thick 4' x 8' board to disguise the orange peel texture on our wall (cut down to size at the store)
  • (2) 8' x 2" x 5/8" thick primed (white) mdf for the vertical boards
  • 1 primed (white) wood trim piece for the top (cut to size) - this was priced by the foot so we only bought what we needed
  • (1) 8' x 6" primed piece of wood to make a new base board that would be wide enough so the vertical boards wouldn't extend over the bottom (you'll see what I mean later)
  • Primer (for the brown back-board)
  • 1 tube of adhesive to glue the back-board to the wall
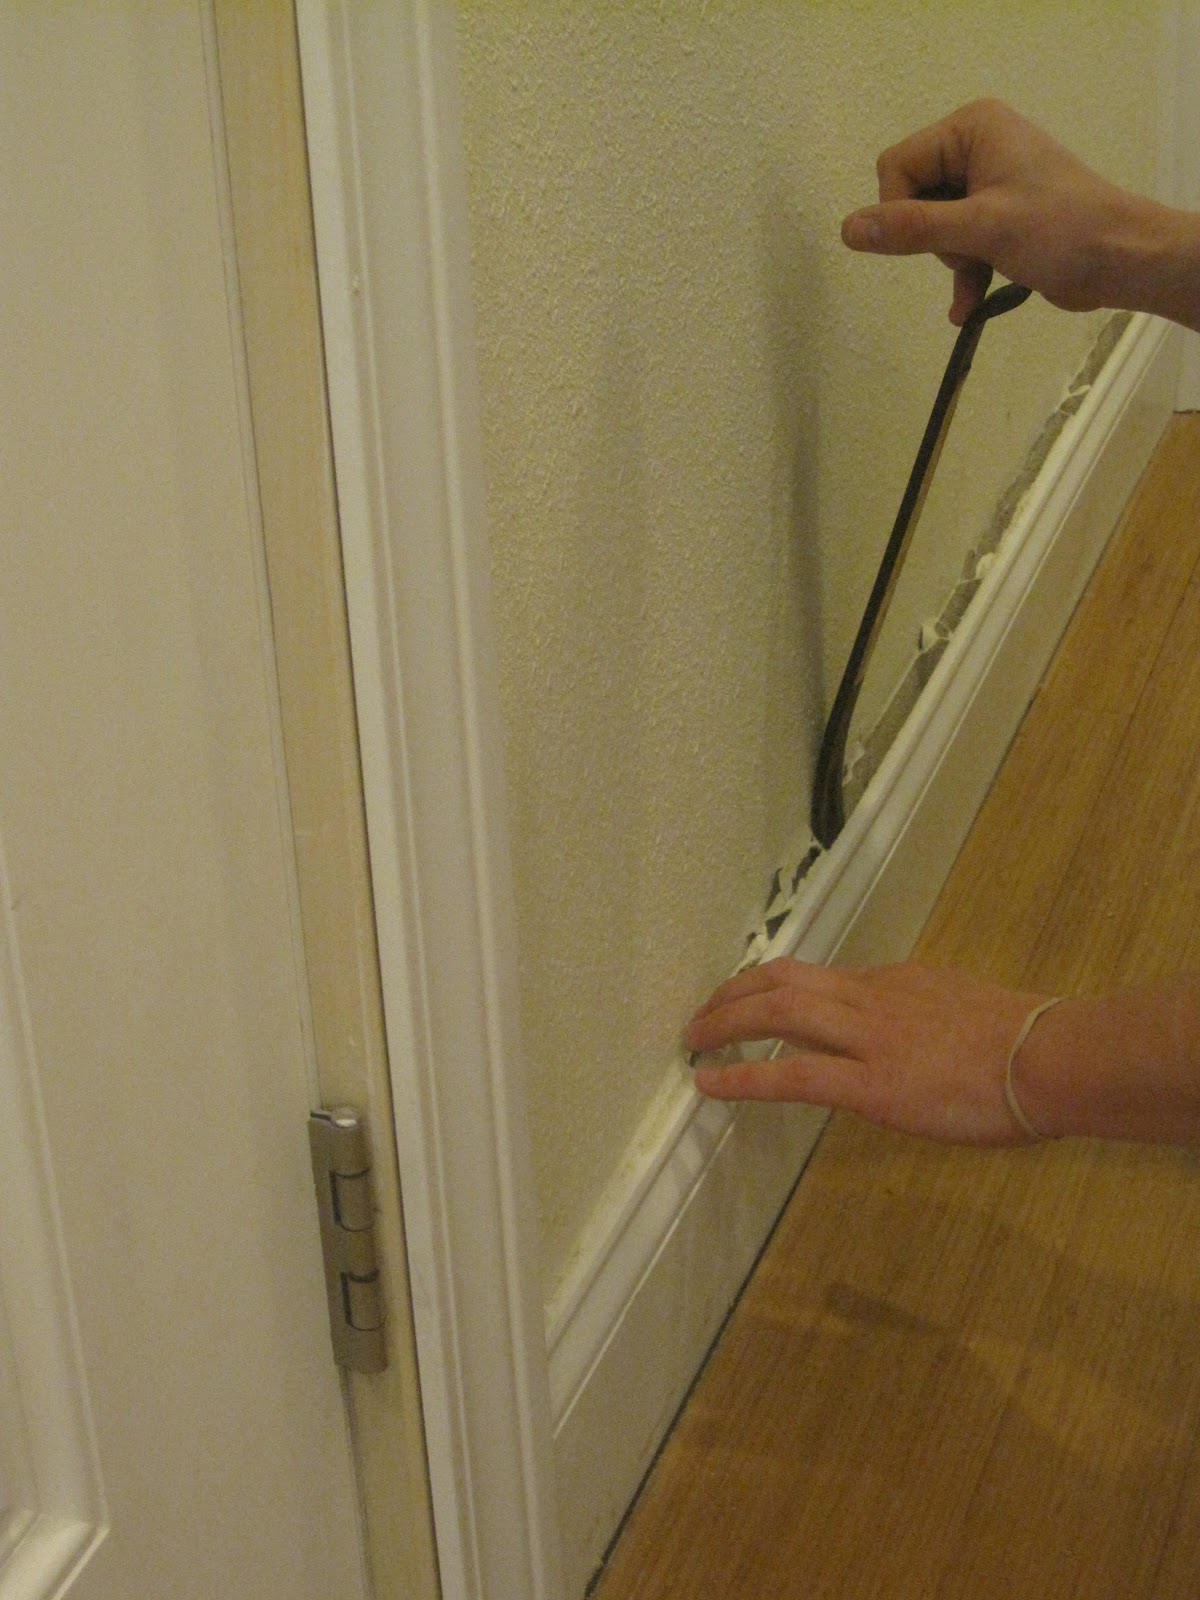
When we got home, the first step was to remove the existing baseboard (and cross our fingers hoping we know what on Earth we were doing).

Then we brought in our back-board and and slipped it in place. Because the fine people at Home Depot already cut it to the right length (we kept the 4 ft. height as-is) we were cooking with gas. The fit was right so my hubby added some of our adhesive, put it in place and smoothed it out over the wall's surface. Then he put a few nails in place to ensure it was set.


After that, the pre-cut trim piece was nailed in place, followed by the baseboard below. To prepare that, I got my primer out and primed the back-board.


When that was dry, we measured again for the vertical pieces that would add some detail and cut those as well. They hung out a bit from underneath the top trim piece so we notched those and nailed them in place. When the nail holes were puttied, then the final trim was added along the baseboard and I painted everything white. (And with everything cleaned up and out of the way, we could open the door to the laundry room to let in some natural light!)

Then we repeated the wait-to-dry process and when ready, we added the hardware and called it a day. All in all, this project was relatively simple. Because most of our materials we're measured and pre-cut when we got home, assembling everything took only about an hour. Adding in some dry times, we probably had this complete in under 2 hours.


Now to decide if we do more?? For now, we're really excited with how this turned out and love the added character and functionality it affords us! *whew*

Monday, January 23, 2012

Fixing an oops

Sometimes I make bad decisions.

That's right. Like the little diddy that resulted in the post you're about to read. You see, back when I was preparing for the Halloween party, I had a little moment when I got carried away with my old pal, hot glue gun. I had purchased this $2 felt Happy Halloween sign and shortly before the party I realized I hadn't hung it. I gave the room a quick survey and determined it would look great on the mirror above my dinning room buffet.

Oh, but how to hang it? Tape? Ack. Let's get a little more permanent why don't we? Well let me show you why tape would have been the rationale, intelligent choice, i.e. the one I did not make.


You see those black spots? Try putting your sunglasses on and look above my blinding flash. Yup, that's where I ripped the paint right off. After Halloween had passed, I started taking down my decor, and I attempted to gingerly peel the sign off. That's when I heard an unfortunate sound and gasped. With my mouth hanging open and my heart beating ever so quickly, I panicked and went all in on the old "rip the band aid" approach. A hot second later I had not one, but three big spots where the paint was gone. Oooh, not good.

So, I ignored it until just before Christmas when I hung something over it. Hiding always works. Well, until that came down and by then, my hubby finally noticed. It went something like ... la di da, walking past the dinning room ... "whoa, what the hell happened to the mirror?!?" Then I had to explain I had an unconscionable moment of passion with my hot glue gun and it hadn't turned out so well. (And oh, it happened two months ago Captain Observant.) In response I got an, "ohhh, honey"... followed by a pitiful head shake as he left the room.

Once the cat was officially out of the bag I determined it was indeed time to attempt to remedy this "situation." I headed to Michael's Craft Store and poked around a few aisles with paint when I came across this. I picked up a cheapy sponge brush and brought it home.


Note I do not think these sponge brushes are good for much of anything other than being cheap. But some of the sponges or related things were pretty pricey and I wasn't feeling terribly confident in what I was doing anyhow. So I just went with it and the paint: total $6.

I risked a hernia pulling the mirror off the wall and shuffled over to my counter. I laid the mirror down, opened the can up and gave it a whirl. A couple strokes in and this is what it looked like.


Yikes! My heart started racing again. I had one foot aimed toward the sink ready to run for some water and try to frantically remove it, and the other stayed in the direction of the mirror just stunned by how atrocious this was looking. After three seconds that seemed like an hour in my head, I decided I really didn't have a better option.

Even if I could remove the paint, I was left with three nice size black marks that were noticeable enough my husband spotted them. And yes, that's saying something. So, I drew a deep breath and moved forward. Here's what it looked like next.


Are you kidding me??? Not good. In fact, REALLY bad. At this point I set down my $0.50 sponge brush so I could rub my temples and run my fingers through my hair, trying to feel for any new gray hairs that may have sprouted sometime after this project began. Then I resorted to some whimpering and shallow breathing before convincing myself I still had no other option. So I whipped out a few of my favorite cuss words and proceeded.

I figured my best bet was to get a few layers in and see what it looked like then. And since the paint was looking like faux silver anyhow, I decided to try to make some intentional-looking brush marks since it wasn't going to have a smooth finish.

To do so, I painted the entire mirror using horizontal brush strokes. Then I waited about five minutes for it to begin to dry before making strokes in the opposite direction. The effect was actually looking right, it just wasn't covering very well. But this time I decided patience was in my best interest and after four coats using this same approach, everything was covered and it was looking much better.


It's certainly not perfect and the color is a bit brighter than it was before. That said, it sure looks better than it did a few days earlier. While I still see some things that aren't quite right, I don't think anyone else would really notice. So for now, the mirror is back in it's old home and me and my hot glue gun are taking a break from each other. We just need a little distance and then we can talk again.

Sunday, January 8, 2012

Purple's Reign: London's Bedroom Makeover Reveal

In part two of London's Purple Bedroom Makeover, I tackled the closet storage situation and since then, I've finished the last two projects. One was a storage shelf that I placed under London's bedroom window for toys and such (just bought and put together) and the second was a DIY headboard. I've done a handful of headboards now, six I think, and this one was by far the cheapest. Here's what I needed and where I scored the deals.

WOOD
I typically opt for a 1/2" to 3/4" piece of plywood or particle board. Depending on what you buy and the thickness, a 4' x 8' sheet of this will typically run you $15 - $18. As luck would have it, my husband was having some other wood cut at Home Depot (where I recommend you buy this since they'll do some cuts for you for free) and found a piece that would work in their "scrap" pile. The piece was marked to $2 but since my hubby was making friends with the guy there, he got it for $0.50. Say what? Awesome.

BATTING
Depending on the shape and thickness of the headboard you're doing, quilt batting or foam will work to provide thickness and cushion. In this case, I decided to purchase three yards of solid comforter fill (i.e. what you'd put in a comforter if you made your own). It was one piece and worked with a 40% off a single by the yard item coupon at JoAnns Fabrics. Total here: $9.00 (big score ... I've paid over $20 for foam or batting in the past).

FABRIC
I always start in the clearance fabric section first, because ... well, why not? You never know what they'll have and some fabrics can be very pricey ($35+ per yard). I found a solid purple fabric here that was on clearance for $5 a yard. Also, since it was the end of the bolt, I got an extra 50% off: total, $5.50 for two yards.

Total cost of headboard: $15.00

To get started, I measured the width of the bed and then put a piece of tape on the wall to represent the height of the headboard; then I measured that. It would be 42" W x 40" H. Then I got out some wrapping paper, yes ... wrapping paper as in presents ... and I used that to make a template. I cut a piece that was 21" wide (1/2 the width of the headboard).

I doodled out the shape I wanted and then put the measurements on their for my handsome carpenter to reference. Then I drew out what would be half the shape of the headboard. You might be able to tell from some of the lines that I didn't like my first attempt. As long as you can remember which line you actually want when you cut it, really doesn't matter how many scribbles you have.

So then I cut out my template and taped it to the plywood which by this point was exactly the height and width I needed. (Again, Home Depot can do this for you.) I traced out one side on the wood, then flipped it over, taped in place, and traced that side too. See?


Then all that was left was the cutting. Well at least for this portion.

When it was ready, I laid the ironed fabric down on the floor with the side you'll see on the bed facing down, and laid the fluffy stuff on top, followed by the wood. Then it's time to staple. I use a small handheld version (non-electric) which works well for me. It's a T50 if that means anything to anyone. (Note I only know this because I had to phone a friend from Ace Hardware this morning when I couldn't figure out what size staples I needed.)

Once it's laid out, I make sure everything is tight and then I start by stapling the bottom first. It's important for the bottom to be straight and secure.

Once the entire bottom was stabled I tighten the fabric again (as you'll do throughout the process) and stapled at the top. This allows me to keep the fabric straight and make sure it's tight without looking lumpy or out of sorts. Then I gave the batting a little trim (see upper left of pic below), followed by the right (not shown here). Afterwards, I stapled to the sides ... doing some on the left, then the same amount on the right, alternating to ensure things remain even.

Throughout the process, I'll pick up the entire headboard and lean it against the wall (front facing me) making sure everything looks right. The last thing you want to do is finish without having checked your work, only to find things are crooked or bunching in all the wrong places. It's like having a headboard wedgie and that's never good.

When I get to the curved parts, I have to pull and push and tug and staple closely. In some cases, I needed to cut the fabric to release some of the tension and get it to pull correctly in the curves. When doing so, you have to be careful not to cut too close to the edge/front, or the whole thing could be ruined (been there done that, there were tears).

Alright, so when all is said and done, my headboard looked like this.


And here's the finished room. It's not perfect, but given I was trying to salvage some of what we had (including the drapes which are staying for a while yet), it's a pretty big change. Most importantly, my little London is very happy!

BEFORE (post crib, just brought in bed):


AFTER:

Thursday, January 5, 2012

Purple's Reign: Part 2

In my search for new bedding for London's purple-inspired bedroom makeover, I came across these beauties at Marshall's. Not only was it love at first sight but they were in the clearance section for $9.00 each. I thought the pillows' pattern was poppy and fun. It didn't say little girl (which I actually preferred), but the colors would work well. It had different shades of purple, as well as green to match her bedroom walls ... with a bright magenta thrown in. "Hello, beautiful!"


Amazingly, they also matched a set of lilac polka dot sheets I found at the same store. I excitedly made my way home and was eager to show my husband that night. When he saw the pillows his reaction was "whoa, really?" Ugh. *eye roll*

There may also have been an odd comment here and there about "temporary blindness" or "seizures" but I can't be certain. I stopped listening after "whoa" escaped his lips and went about the business of decorating.

In part 1 of the makeover, I told you about a table and mirror that I purchased and decided to spray paint white. I removed the tape from the mirror and got that hung, removing any excess paint that snuck under with a razor blade and on occasion, an unmanicured fingernail. I then paired that with a little chair that's actually made and sold for bathrooms.

Here's that before picture ...

And after ...

Her new desk got a hot pink planter turned garbage can, the updated lamp, and something to organize her necklaces and hair accessories. This sits to the left of where her dresser used to be, also left of her tree.

Sad that my photography skills are so poor you need night vision goggles to see some of these pictures.

Anyhow, speaking of that dresser, we happen to have another baby on the way so that will be moved to the nursery with London's crib. It matches and seems better that way. Of course, that also means London is without until I figure out what type of furniture we might want to purchase for her room long-term.

Meantime, I remembered we had one of those white DIY shelves that they sell at Target ... the kind you buy those little colored cubes for. So, I asked my dear hubby to bring that up from the basement and I picked up a variety of storage cubes in purple, a couple in pink.

Then I hunted through some of my scrap booking supplies and made a few labels for each one. We'd have plenty of boxes to organize everything from socks, to tights, to pajamas.


And that's where I am now. I have one more project for the room to finish up this weekend, and then I'll be ready to show you the whole finished project.

Sunday, January 1, 2012

Purple's Reign: Lady London's Bedroom Makeover, Part 1

Just before Christmas we needed to formally remove London's crib from her room. She had learned to scale its walls despite the fact we had drilled new holes into the legs, leaving the mattress nearly on the floor. I guess if you can do the Chinese splits in the air, hook half an ankle over the edge and then have the strength to heave yourself over it, you've officially shocked your parents enough to earn yourself a big girl bed. At least that's what it takes in this house.

So that day had come and sadly (for me) another day quickly followed. It was inevitable of course ... my daughter would go through it just as all little girls before had ...yes, it was the day she only had eyes for the color purple. *sigh*

Not that there's anything wrong with purple but I had carefully planned her room using less traditional colors and a more unusual theme. It had a woodland creatures vibe, using soft greens, tans, chocolate browns and orange accents. It was cute, and I really liked it. But now a purple princess room had been requested and who was I to stand in the way of a two year old's happiness? (Actually I have every right but it seems futile; battles need to be carefully chosen in this kingdom.)

So, I decided to do some stretches, quick DIY exercises, and get the work underway. I began by assessing what we already had and determining what could be repurposed. The first of which was a cute orange lamp that she uses each night. I picked up a new can of spray paint, taped off the neck and the cord of the lamp and got spraying.


Here's the after...

I also took an orange butterfly off her wall and sprayed that with a deeper shade of purple spray paint that I already had on hand. Because it's so cold outside, I moved this work to my basement, using grocery bags to line the floor. Say hi to Pick 'n Save's "Chairman Bob" everyone.

Before:
and after ... oooh la laa

Shortly after moving into this house, I painted a white tree on London's wall and hung some birdhouses among its branches.
I opted to leave the birds without shelter but decided to keep the tree (where they could still rough it if needed).
Here's the tree in it's birthday suit, dresser gone ...

To give it a little makeover, I stopped at Michael's craft store and picked up this can of bridal confetti. Then I got my hot glue gun cookin' and applied flowers among the branches to make this little tree bloom.
My arm nearly fell off and I was cursing myself for adding so many branches, but it was fun when it was done. Here's the tree after spring had arrived ...

and here's a shot from a distance.

As luck would have it, the day I completed the tree, a package from an artist on etsy.com had arrived. I had ordered two new prints to replace the cute owls that had previously filled these white frames, which when hung, flank her bedroom windows.
and the new ones ...

As much as it killed me to think it, the new prints did seem to instantly brighten the space. I considered adding a lilac colored mat to frame them but have decided against it for now. The clean bright, white feel was appealing and got me thinking about plans for this cute table, and mirror I had picked up over a year ago and had yet to use.

The table was from Marshall's or TJ Max and was part of a set of three nesting tables. I thought it would be a cute dressing table or desk for when London was young. Likewise, I found the mirror there too and thought it had a Snow White kind of feel.

But with the new lighter feel in the room, it wasn't very snowy or very white so I called upon my friend, Rustoleum in Flat White, and began its transformation too. I needed to use tiny pieces of painter's tape to make my way around the curved edges, but eventually it was ready for a dusting of color.


Nearly done. With that, I just need new bedding, a clothing solution since I opted not to bring the dresser back in and some room for toys. It's a work in progress, though I'm nearly there so stay tuned!

To be continued...